NEMO Tensor All-Season Sleeping Pad


Details
Improving on their best-selling original Tensor line, Tensor™ All-Season offers greater warmth for four-season use without adding any weight. Designed to be a go-to pad all year long, it straddles all seasons and keeps its reputation for low-decibel dozing.
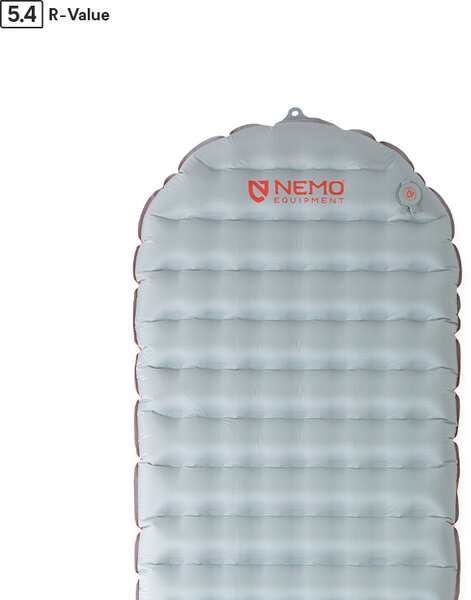
The pad’s interior features NEMO’s proprietary Spaceframe™ baffle design, which utilizes low-stretch fabric trusses to create stable support and offer just the right amount of give — all while avoiding any wobbly waterbed feeling. Inside each baffle are two suspended layers of ultra-thin, metallized Thermal Mirror™ film, which efficiently reflect body heat and contribute to the pad’s overall 5.4 R-value. The layers’ clever floating construction eliminates the crinkling, crunchy sound that many insulated air pads are known for, earning Tensor a reputation for peace and quiet on the trail.
Armed with premium, durable 20D (top) and 40D (bottom) nylon, Tensor All-Season is better protected against punctures and tears, and — like all NEMO sleeping pads — it includes a Vortex™ pump sack. Vortex effortlessly mates with the pad’s zero-profile, microadjustable Laylow™ valve for easy inflation in just minutes.
- Two layers of floating Thermal Mirror™ metallized film provide quiet insulation with an unprecedented weight-to-warmth ratio.
- Impressively quiet for uninterrupted sleep (and happy neighbors).
- Spaceframe™ baffles offer unparalleled stability and weight distribution, using low-stretch, die-cut trusses that eliminate springiness.
- 3.5 inches of stable, cushioned loft for incredibly comfortable nights.
- bluesign® approved premium nylon fabrics shave grams while offering superior puncture- and tear-resistance.
- Included Vortex™ pump sack provides easy and fast inflation, saves breath at elevation, and minimizes moisture entering the pad.
- Improved zero-profile, multifunctional, microadjustable Laylow™ valve offers customized inflation control, even in cold temperatures.
- Available in a wide range of sizes to easily pair with the rest of your sleep system.
| Specs | Regular Mummy |
|---|---|
| Minimum Weight | 0 lb , 14.1 oz / 400 g |
| Packed Weight | 1 lb , 1 oz / 480 g |
| Packed Size | 10.0 x 4.0 in dia / 25.5 x 10 cm dia |
| R-Value | 5.4 |
| Thickness | 3.5 in |
| Shape | Mummy |
| Color | Blade/Spicy Orange |
| Insulation | Aluminized Film |
| Specs | Regular Wide |
|---|---|
| Minimum Weight | 1 lb , 3 oz / 530 g |
| Packed Weight | 1 lb , 6 oz / 620 g |
| Packed Size | 10.5 x 4.0 in dia / 27 x 10.5 cm dia |
| R-Value | 5.4 |
| Thickness | 3.5 in |
| Shape | Rectangular |
| Color | Blade/Spicy Orange |
| Insulation | Aluminized Film |

It is important to limit the amount of moisture that enters a sleeping pad to extend its life and prevent any mold or mildew growth. Many users bring a pump sack (check out our Vortex™ Pump Sack) or portable battery-powered inflation device with them on the trail to help minimize humidity levels in their pad, but it is impossible for the pad to stay 100% moisture-free. A simple air-dry, hanging method (valve-side down) with opened valves should do the trick between trips, but if you notice your pad starting to look grimy, we recommend following these directions for cleaning your pad.
Cleaning Your Sleeping Pad
General Instructions
- Wipe down the surface of your pad with a wet and/or soapy cloth (use mild, non-detergent soap).
- Make sure to keep water out of the valves (keep valves closed).
- DO NOT MACHINE WASH OR DRY YOUR PAD. Washing machines will destroy the lightweight materials we use in our pads.
- Air dry your pad flat or on a clothesline with the valves open.
- Make sure to dry your pad away from direct sunlight as exposure to UV is harmful to the fabrics.
- Once the pad is fully dry, store your pad outside of its stuff sack flat or loosely rolled in a cool, dry place. Leave valves open during storage.
Other Notes: Do not store compressed. Compressing foam and insulation long-term can damage the pad, so we recommend leaving the pad valves open for storage and loosely rolling the pad, hanging it, or keeping it flat.
Mold/mildew cleaning instructions
- Wash the exterior of your pad with a product like ReviveX Odor Eliminator, which works well to remove mold and mildew odors if they are on the exterior of the pad. This product is not intended to remove mold and mildew stains.
- Keep the valve closed and don't submerge the valve.
- Let the pad dry while it is fully inflated. Direct sunlight will help remove mold/mildew growth on the inside of the pad without damaging the fabric, as long as it isn't left in the sun for any extended periods of time.
- After the pad is fully dried, deflate the pad and leave it unrolled overnight. This will help the interior of the pad fully dry.
- Repeat this process if mold/mildew still remains.
- Once the pad is fully dry, store your pad outside of its stuff sack flat or loosely rolled in a cool, dry place. Leave valves open during storage.
Sleeping Pad Repairs
A slow, unidentifiable leak can be frustrating — here are a few tips for locating the leak and patching your pad.
Locating Leaks with The "Tub Test"
We recommend trying a "tub test" to determine the location of any punctures or other damage — many slow leaks are often indistinguishable without performing this test on the pad.
First, fill a bathtub or other large tank with water and dunk the fully inflated pad into the water. If you are able to hold the pad under the water, you should see an area of escaping bubbles — this is usually the culprit if you have a leak. Bending or folding the pad to increase the relative air pressure inside the pad will force even the most stubborn holes to reveal themselves.
Locating Leaks With the “Listening” Method
If you don’t have access to a bathtub, you can try to feel and hear the leak in your pad:
- Inflate your pad until it’s very firm.
- Starting at the top of the pad — squeeze the sides of the pad and bring your face close to the top of the pad. This can either be performed standing or sitting on top of the pad.
- Move across the pad from left to right with your ear close to the pad, continuing down the pad in this fashion.
- Once you’ve reached the bottom, flip the pad and repeat the above steps on the backside of the pad.
- If you don’t find the leak the first time — try again. Sometimes it takes two tries!
Other Notes: Sometimes you can feel the leak before you hear it — that’s why having your face close to the pad can help with finding the leak.
Patching Your Pad
Hopefully, you were able to find the location of the leak using one of the methods above. Now you’re ready to patch your pad. Follow the instructions below for patching:
- Locate the pad repair kit found in the small pocket inside your stuff sack.
- Deflate the pad and lay on a flat surface.
- Clean the punctured area, preferably with alcohol to remove all dirt and grease.
- Apply the appropriate fabric patch with a thin, even coat of adhesive over the leak.
- Press firmly in place, keeping pressure on the patch for the cement's recommended time.
- Let the pad dry for 24 hours before use.
In-Field Repair
If you’re in the field and don’t have the time to let a patch dry overnight, use the following patch method:
- Clean and dry the area around the puncture.
- Use the Tear-Aid patch included in the patch kit to cover the leak.
- Press firmly in place.
Part Numbers
| Option | UPC | Store SKU |
|---|---|---|
| Mummy | 811666035127 | SLE489733914 |
| Regular Wide | 811666035189 | SLE476249614 |